
Model Railroads
Page 19a
The Gazebo – Continued
The other installments
Page 19 – The gazebo build. Good kit, easy to assemble
Page 19a – So what is the shiny thing and how does it make a base?
Page 19b – Wiring the lights
Page 19c – Final installation and the Big Show
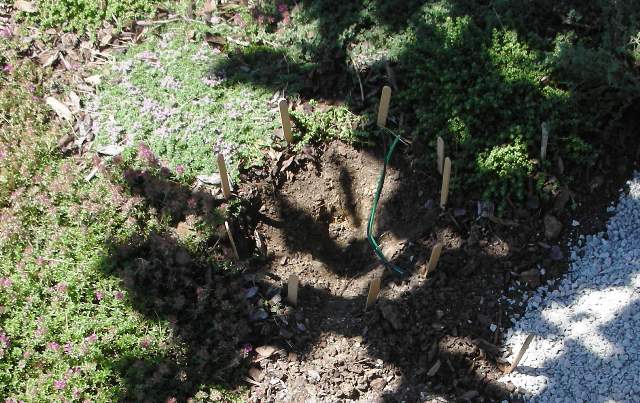
Above – July 6, 2010 – Finally, the hole is dug for the gazebo base. Okay, so the gazebo was built over a year ago, what's the holdup? Well, I spent a lot of those 12 months contemplating how to create some kind of interesting base.
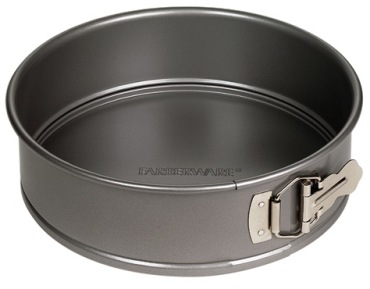
I got it! How about a stone base like I did for the barn? Except the gazebo has 12 sides; ain't no way I am going to figure out a twelve-a-gon, how about a round base? Remember the shiny thing that the built gazebo was sitting on just after it was built? That miracle device is a round cake pan with a removeable bottom and a latch on the side to open and remove the cake (or whatever…..), similar to this one:
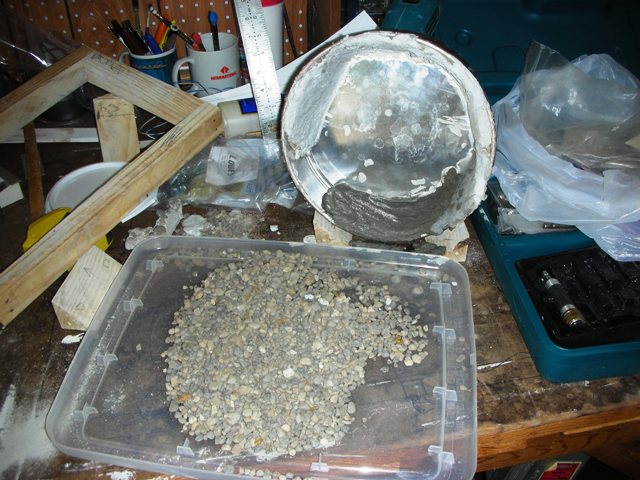
So then, how do you get a high concentration of pebbles to stay in place on the outside of the mortar when you have a round wall? Bet you already peeked below and figured it out, huh?
I considered just mixing the pebbles in the mortar but that spread them out too much. That is what led me to the solution below. I put the cake pan on it's side and put a layer of pebbles on the bottom inside surface and continued them as far around the side as they would stay. I had to keep the pebble layer thin enough so that the mortar could flow through the pebbles and lock them in place.
Above and Below – July 6, 2010 – I got so excited to see if the process would work, I forgot to take a picture of the first layer of pebbles. Above is the process after the first 5 'pebble then pour then rotate and do it again' rounds. Just one more to go.
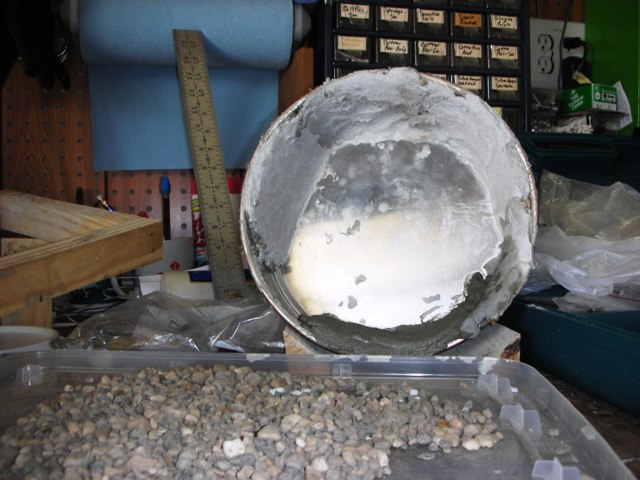
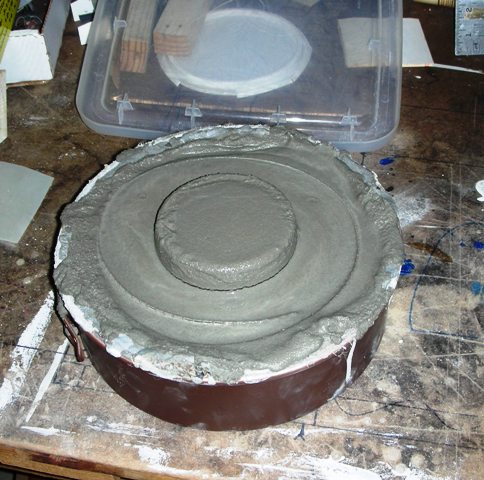
Above – July 11, 2010 – The pebble ring is complete.

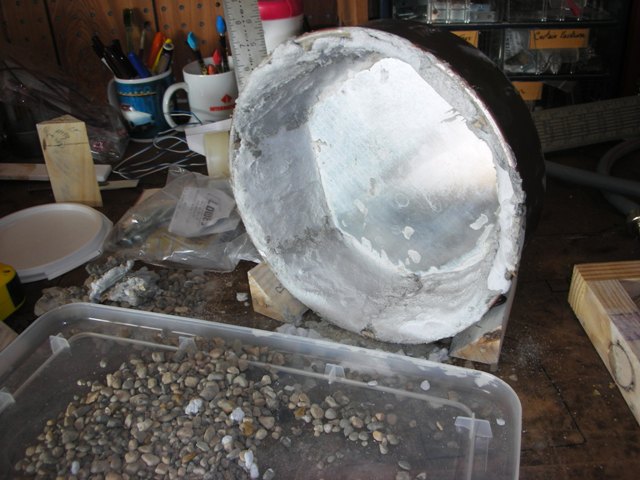
Above – July 11, 2010 – A cottage cheese container and a reinforcing ring of 'hardware cloth' mesh are placed inside the 'pebble ring' (which, you will note, is still in the cake pan for stability). A much thicker layer of mortar is poured in to stabilize the 'pebble ring'.
Above – July 11, 2010 – Brought it back indoors, still pouring.
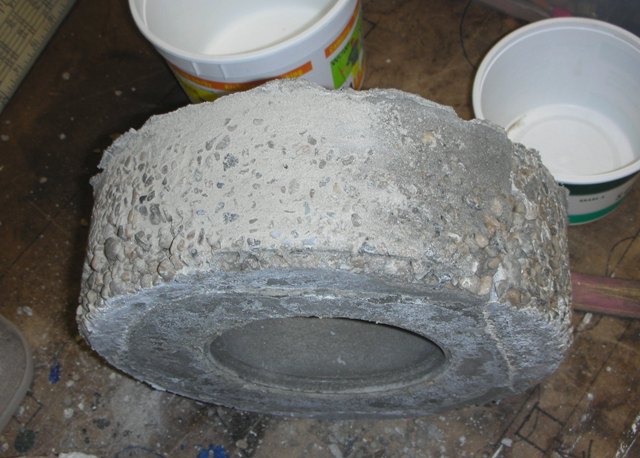
Above – July 11, 2010 – Pouring complete, cake pan ring latch opened and the sides and bottom were removed. Looks like the pebble density and distance to the surface vary a bit.
Above – July 11, 2010 – The mortar cures quicky, still time to lug the increasingly heavy base out for an on-site test fitting. The bottom of the cottage cheese container has been cutout and the wires fed through.

Above – July 11, 2010 – Back inside to wire brush the surface so that all the pebbles show well.
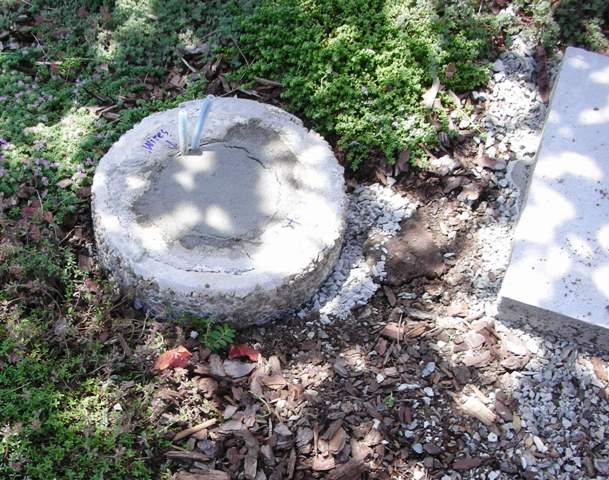
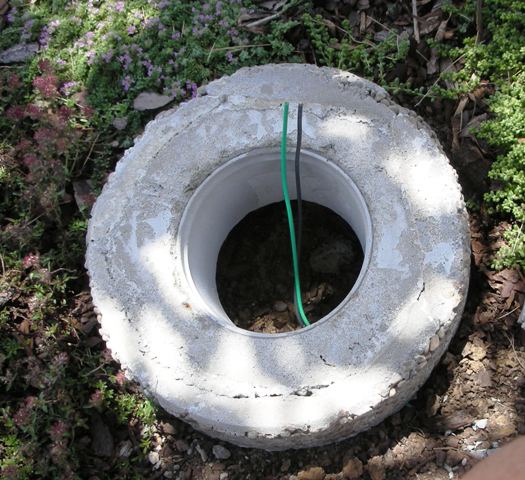
Above – July 11, 2010 – Back outside, position the base, protect the wires and do the final pour into the middle and down to the pebble field below to anchor the base. Glad this is the final resting place, that is one heavy piece!
The heavy lifting is done, now on to the modeling. Click on page 19b below for some detail work.
Page 19 – The gazebo build. Good kit, easy to assemble
Page 19a – So what is the shiny thing and how does it make a base?
Page 19b – Wiring the lights
Page 19c – Final installation and the Big Show
Comments
RRModels019a — No Comments
HTML tags allowed in your comment: <a href="" title=""> <abbr title=""> <acronym title=""> <b> <blockquote cite=""> <cite> <code> <del datetime=""> <em> <i> <q cite=""> <s> <strike> <strong>